Example: Operations overview with picture-in-picture views
This example creates one complete VSR Studio scene. A video playback fills the entire 1280 × 720 canvas. Four smaller spots overlay its right side:
- the live VSR host—the person building and controlling this example,
- a playback representing the VSR operator,
- a playback simulating an on-site team's bodycam and
- a playback simulating an IP camera.
The example uses four WebM files and a transparent PNG overlay provided with this documentation, so no external camera, RTMP encoder, or private stream credentials are required. The host position uses your actual camera. The operator is represented by a playback during the test. After the example works, you can replace the simulated inputs with your own RTSP or RTMP streams.
What you will create
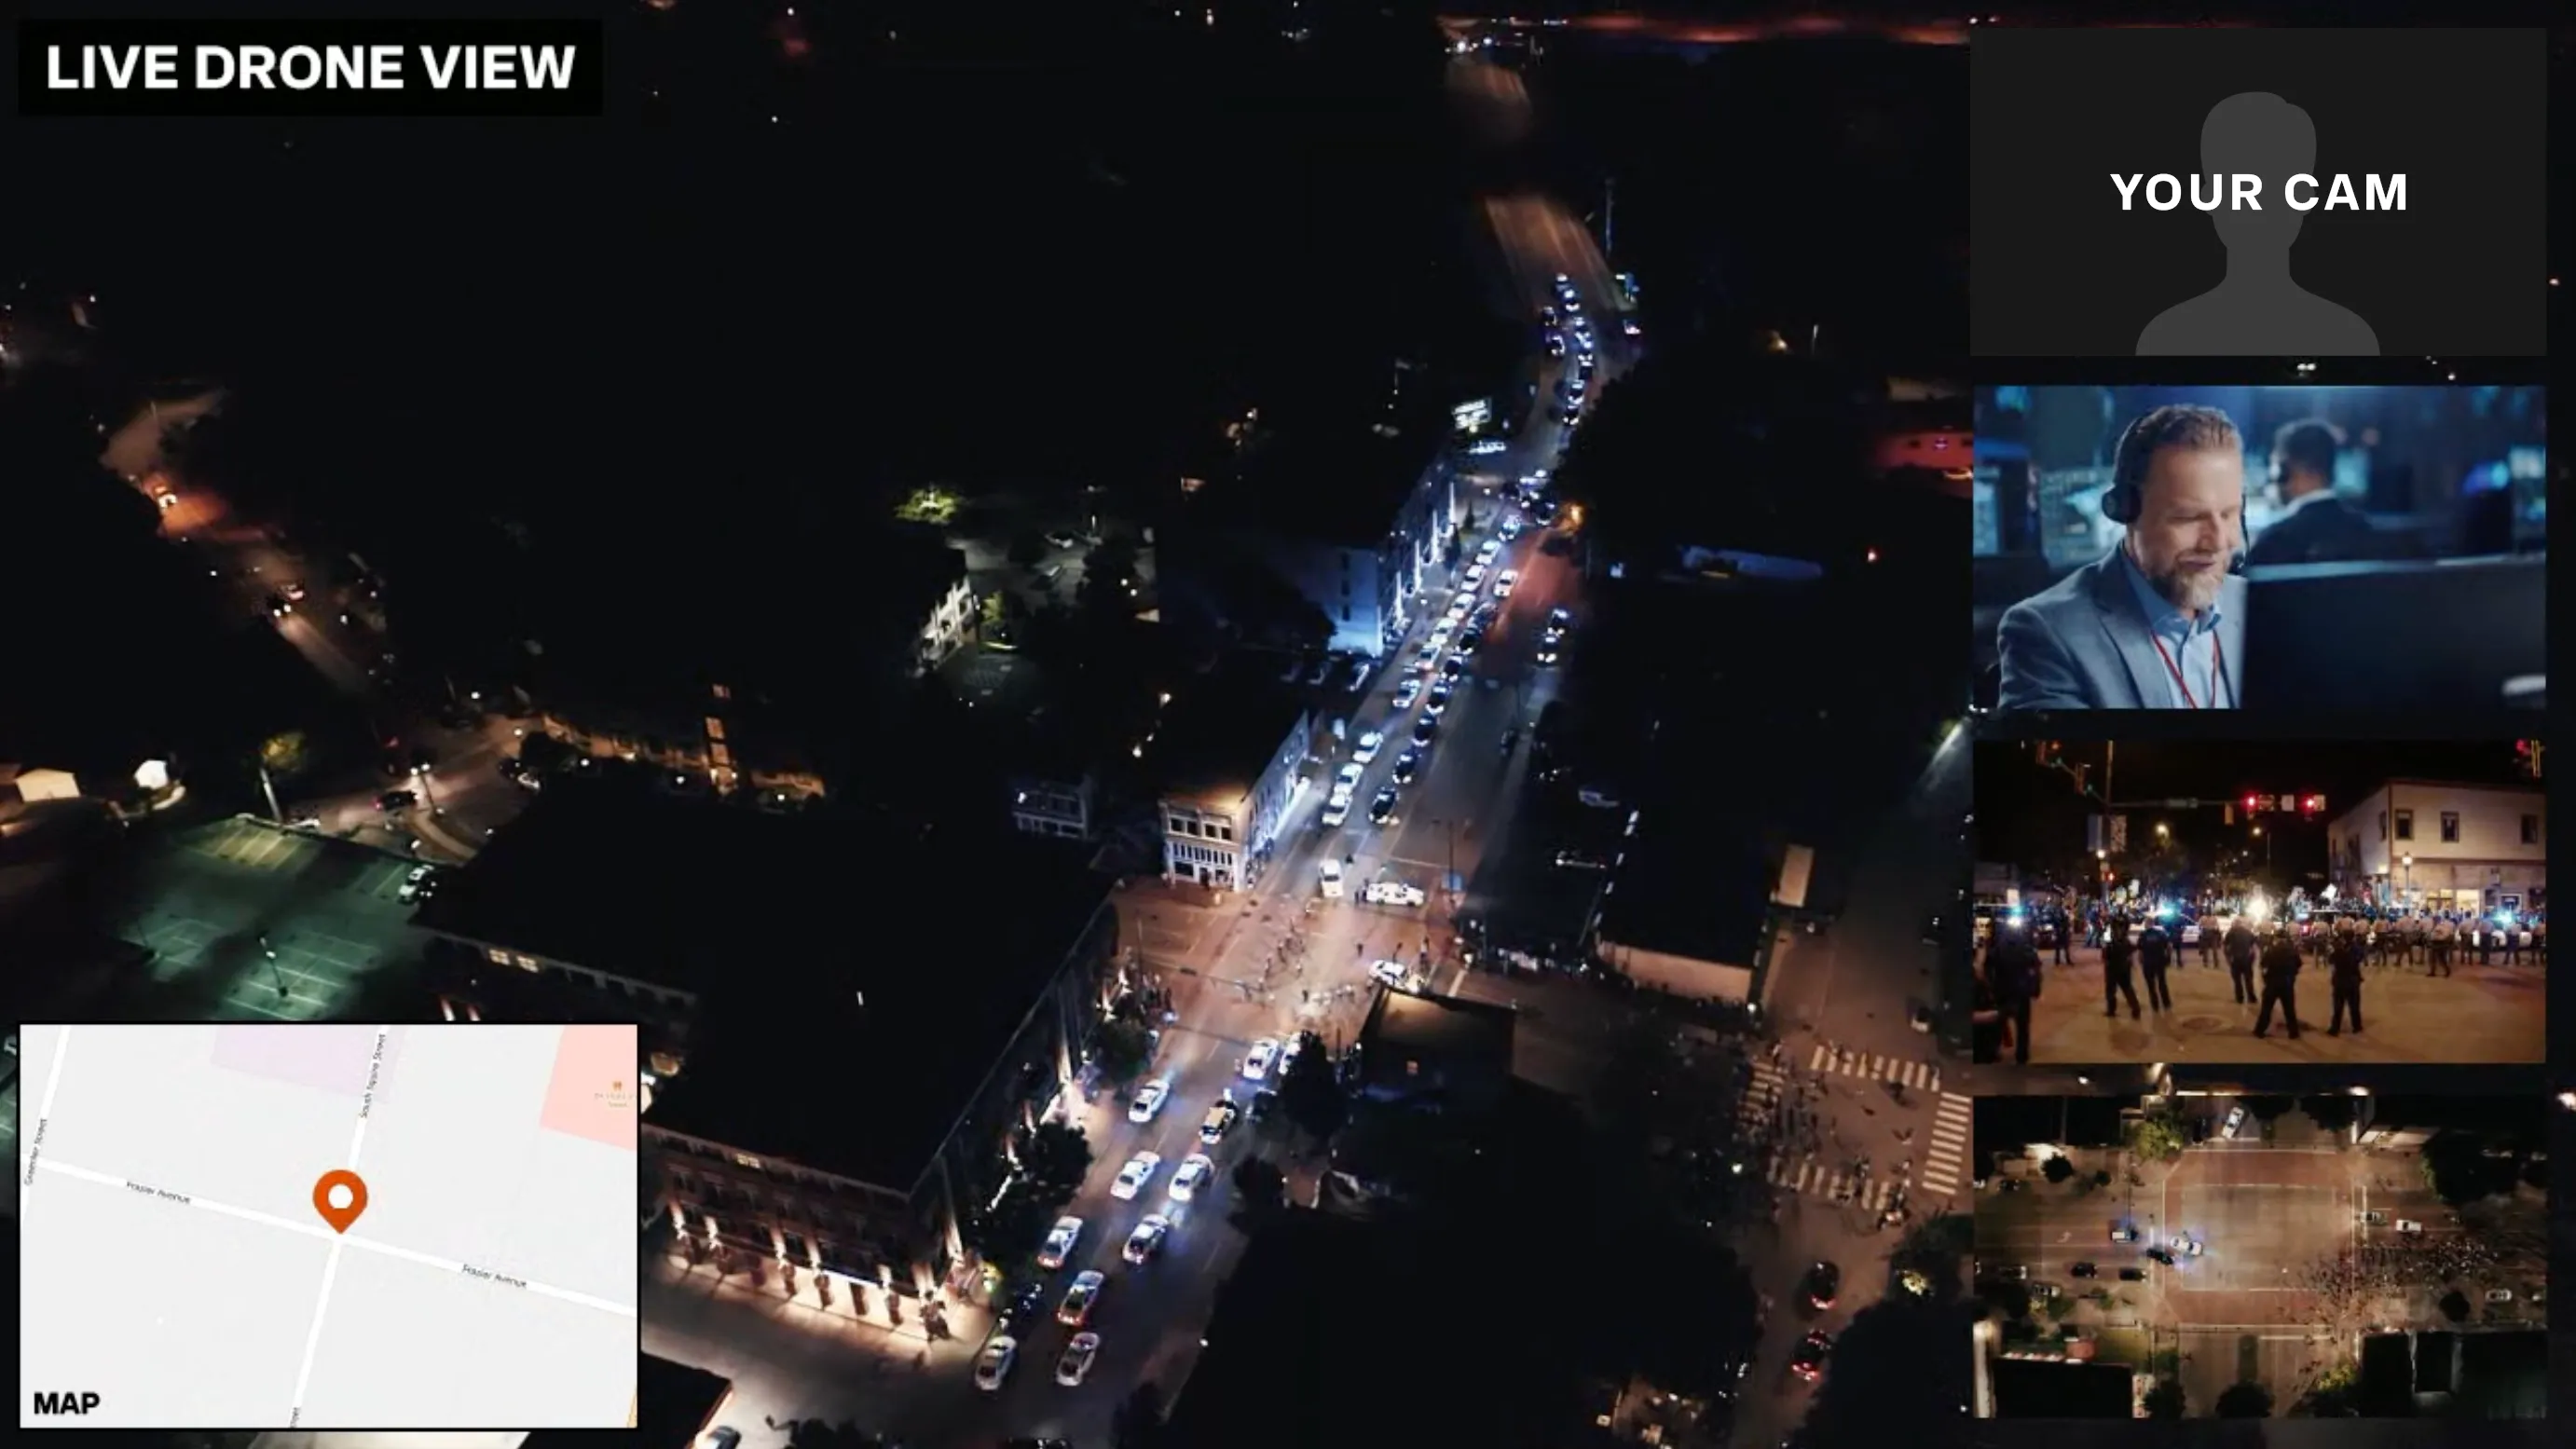
The scene uses five positions:
- a full-width overview playback
- the VSR host
- the Captain playback
- the Bodycam playback
- the Drone 2 playback
Create the full-width playback as Position 1, followed by the four smaller positions. The smaller positions must appear over the main video, not behind it.
Before you begin
Complete the VSR Studio Manual setup first. You need:
- VSR Studio Service running
- VSR Studio open at http://127.0.0.1:4455
- a valid API endpoint, user token, and guest token in Global Settings
- a permalink with widescreen mode enabled
- camera permission for the VSR host
Step 1: Create the full-width overview playback
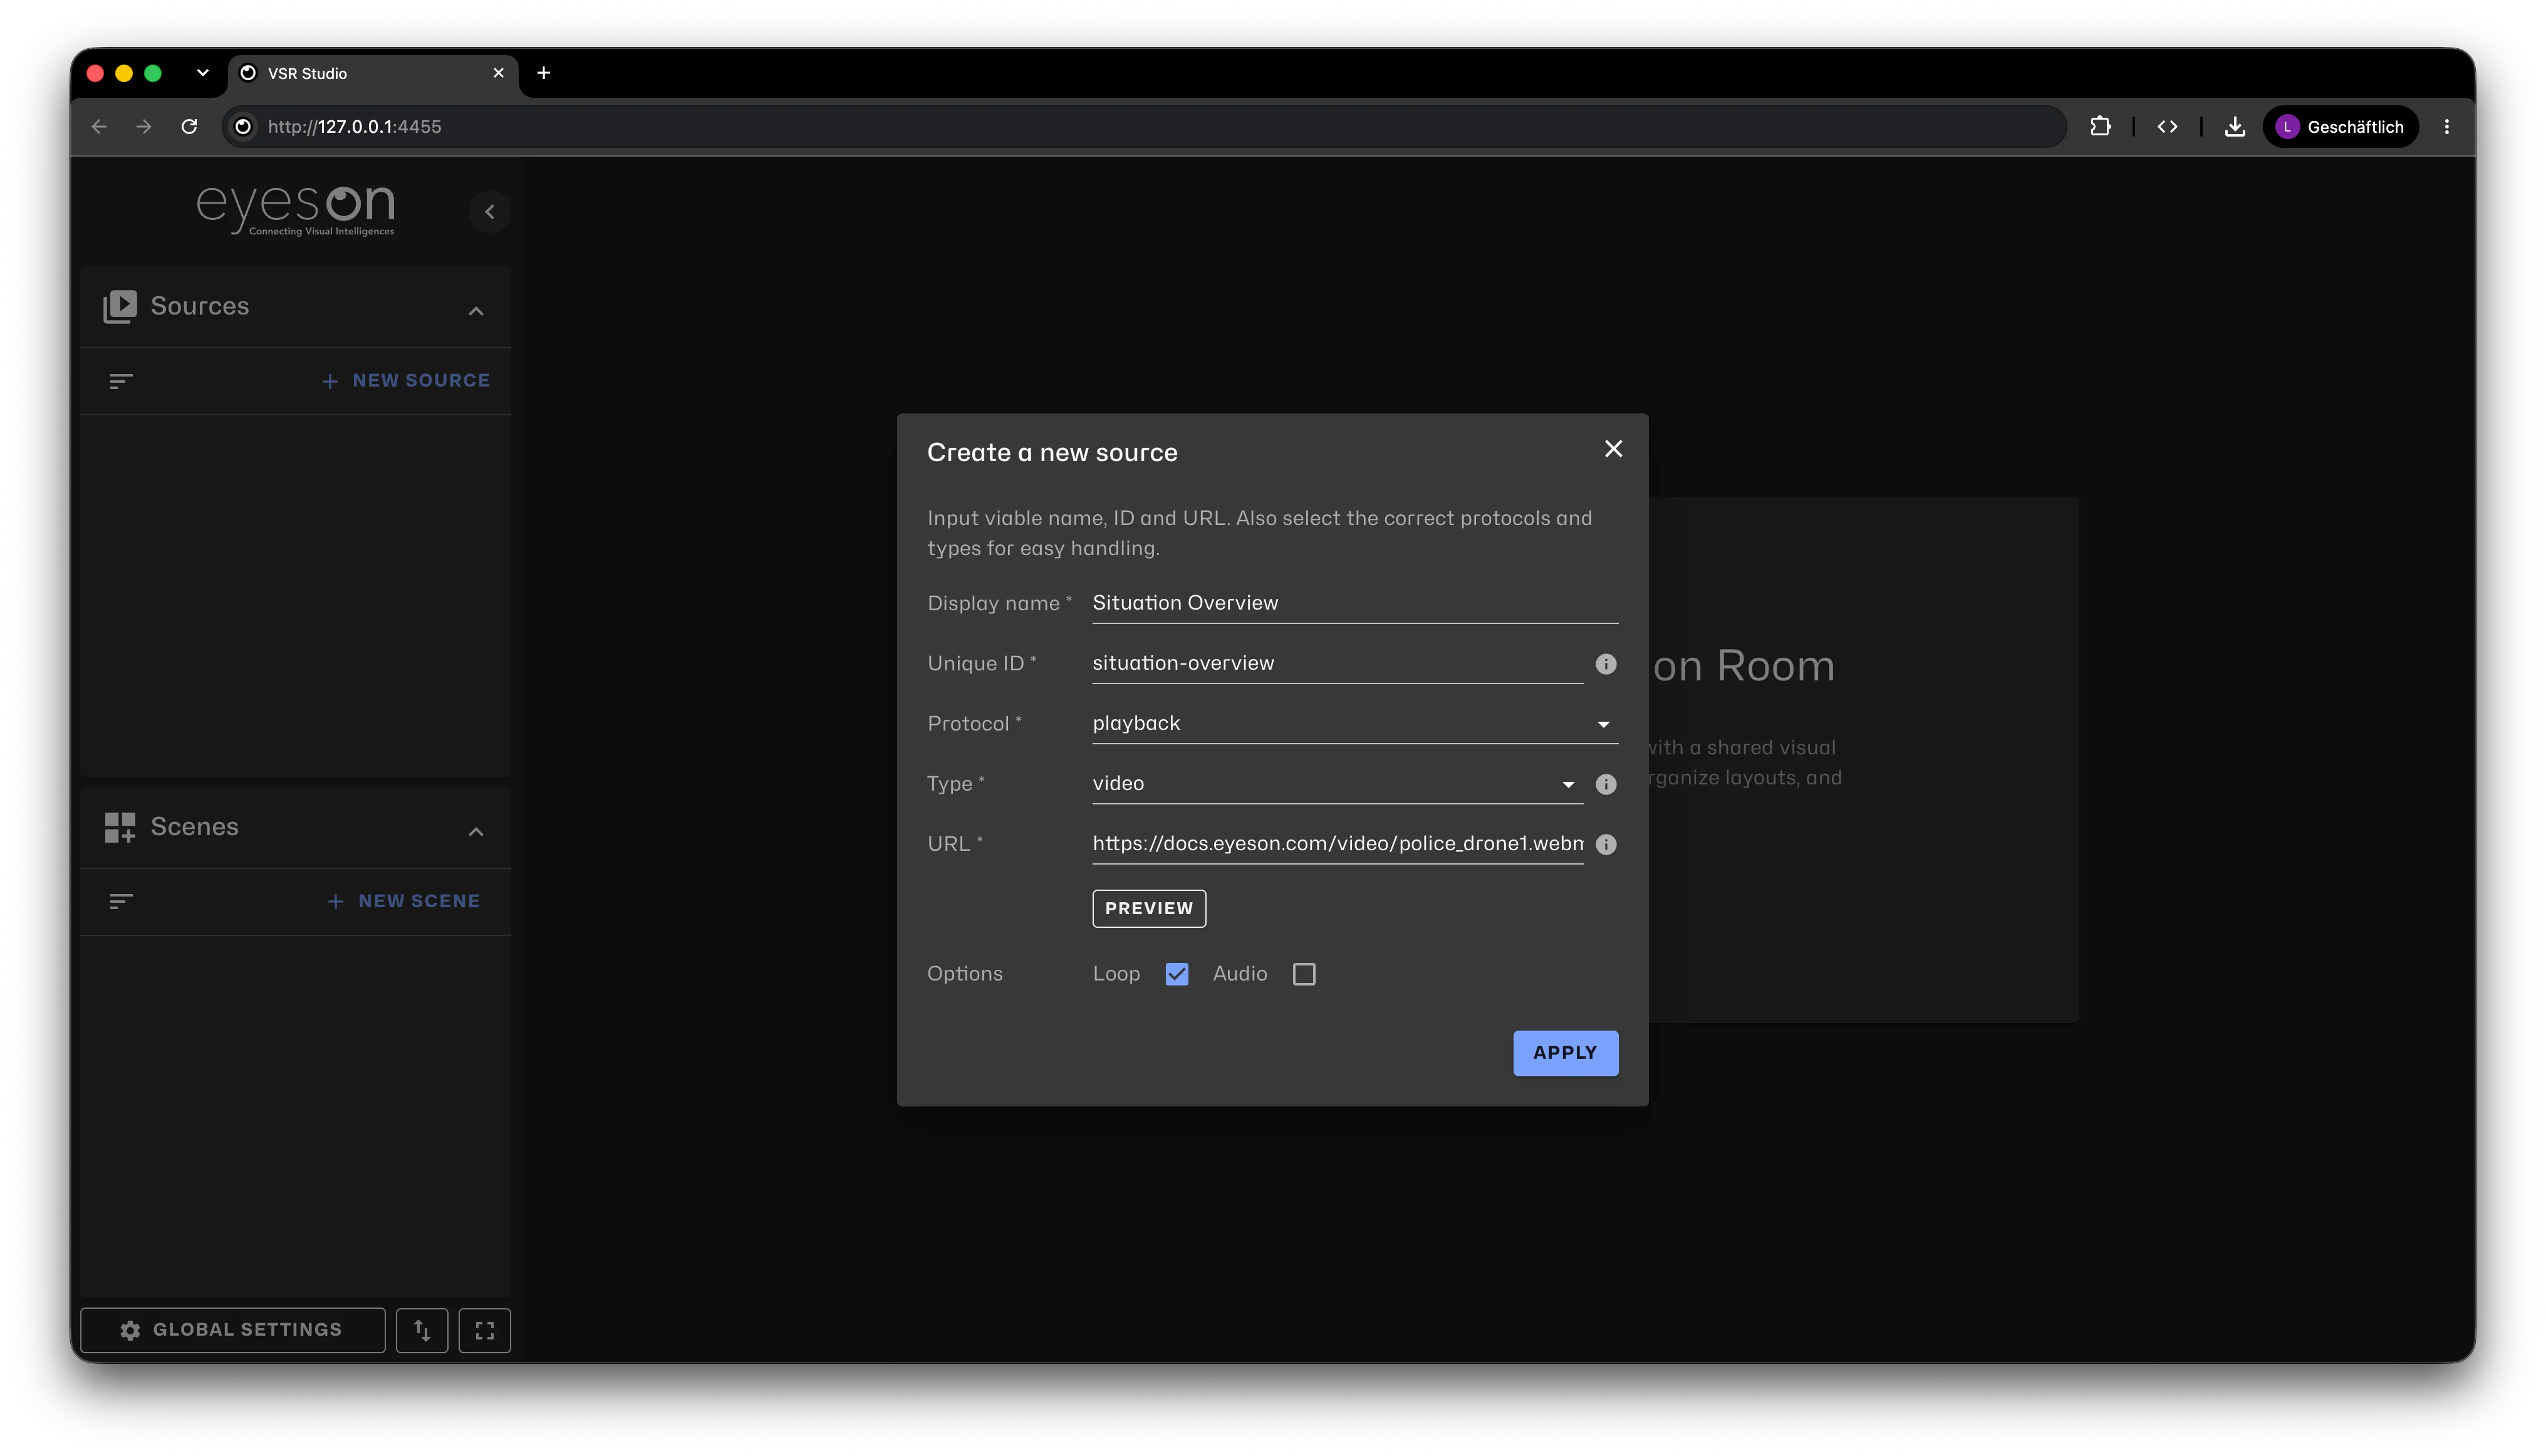
Open Sources, select New source, and enter:
- Display Name:
Situation Overview - Unique ID:
situation-overview - Protocol:
playback - Type:
video - URL:
https://demo-videos-public.s3.eu-central-1.amazonaws.com/doc-vsr/police_drone1.webm - Loop: enabled
- Audio: disabled
Step 2: Create the overlay playbacks
Create three more playback sources.
Use playback as the Protocol and video as the Type for each source. Enable Loop and disable Audio.
- Captain: use the ID
captainand URLhttps://demo-videos-public.s3.eu-central-1.amazonaws.com/doc-vsr/captain.webm - Bodycam: use the ID
bodycamand URLhttps://demo-videos-public.s3.eu-central-1.amazonaws.com/doc-vsr/bodycam1.webm - Drone 2: use the ID
drone-2and URLhttps://demo-videos-public.s3.eu-central-1.amazonaws.com/doc-vsr/police_drone2.webm
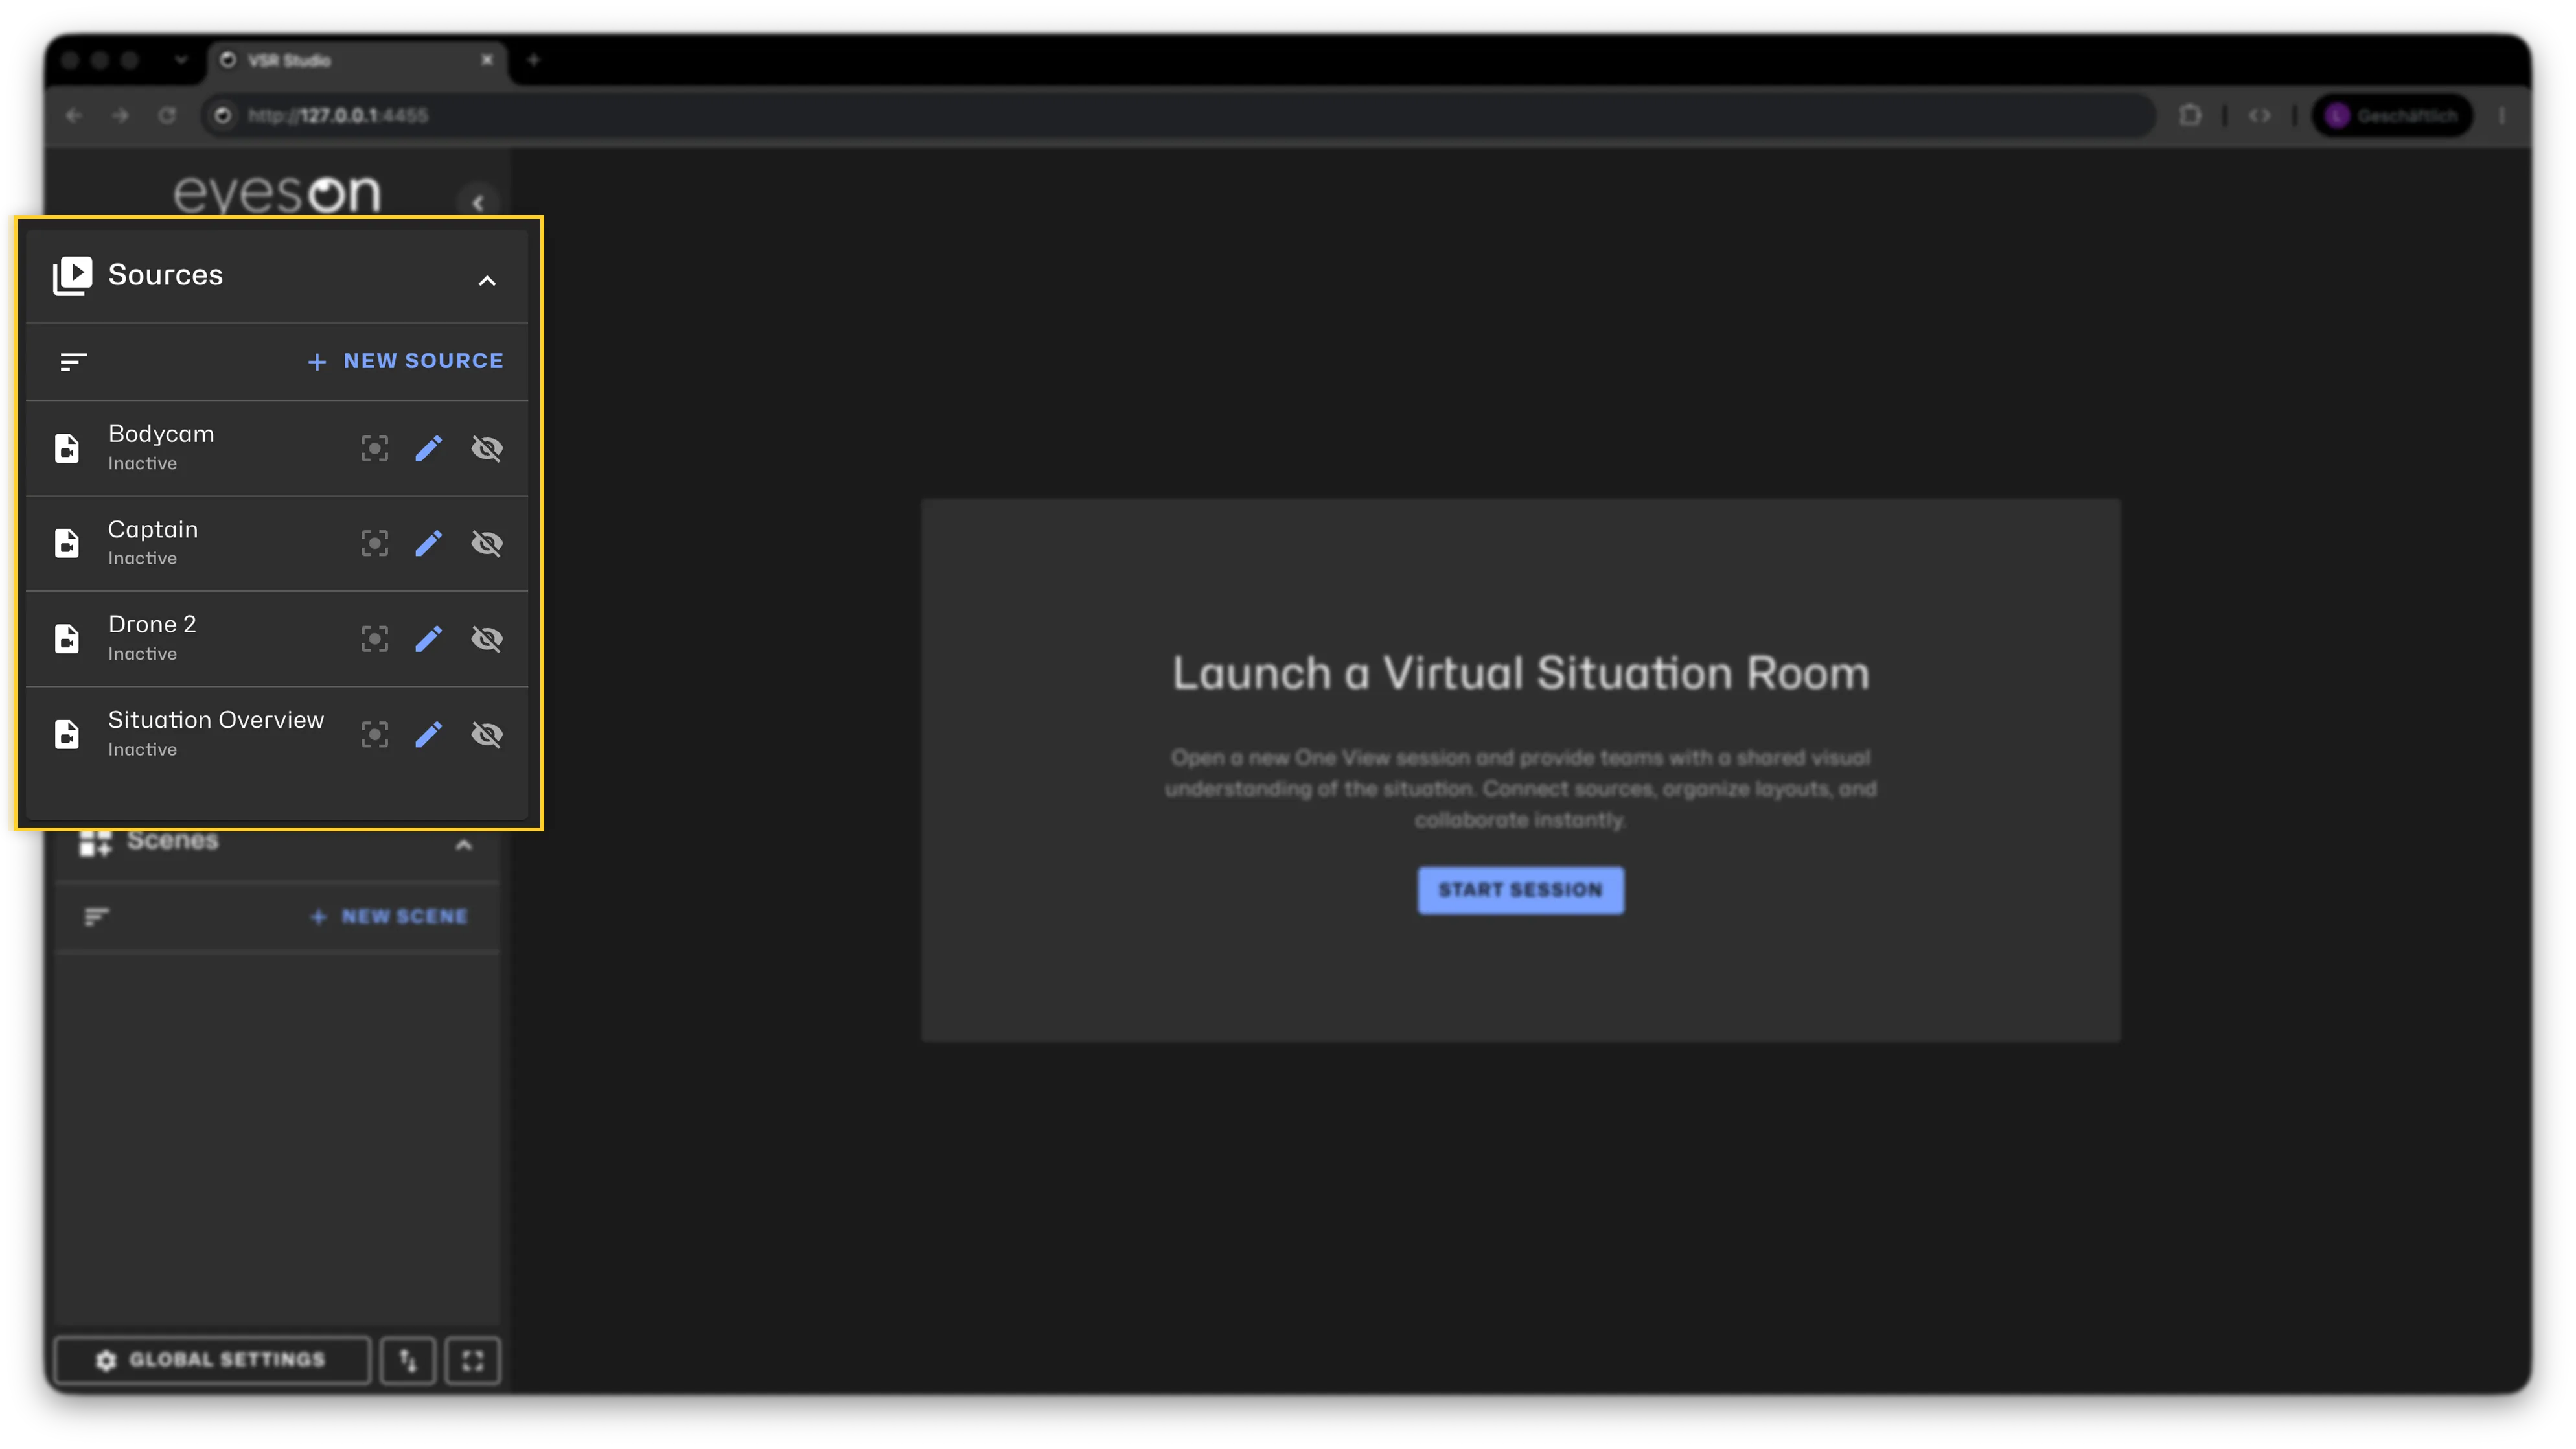
The Sources list should now contain Situation Overview, Captain, Bodycam, and Drone 2.
Step 3: Create the custom scene
- Open Scenes and select New scene.
- Enter
Operations Overviewas the scene name. - Select Custom as the scene type and continue to Mapping.
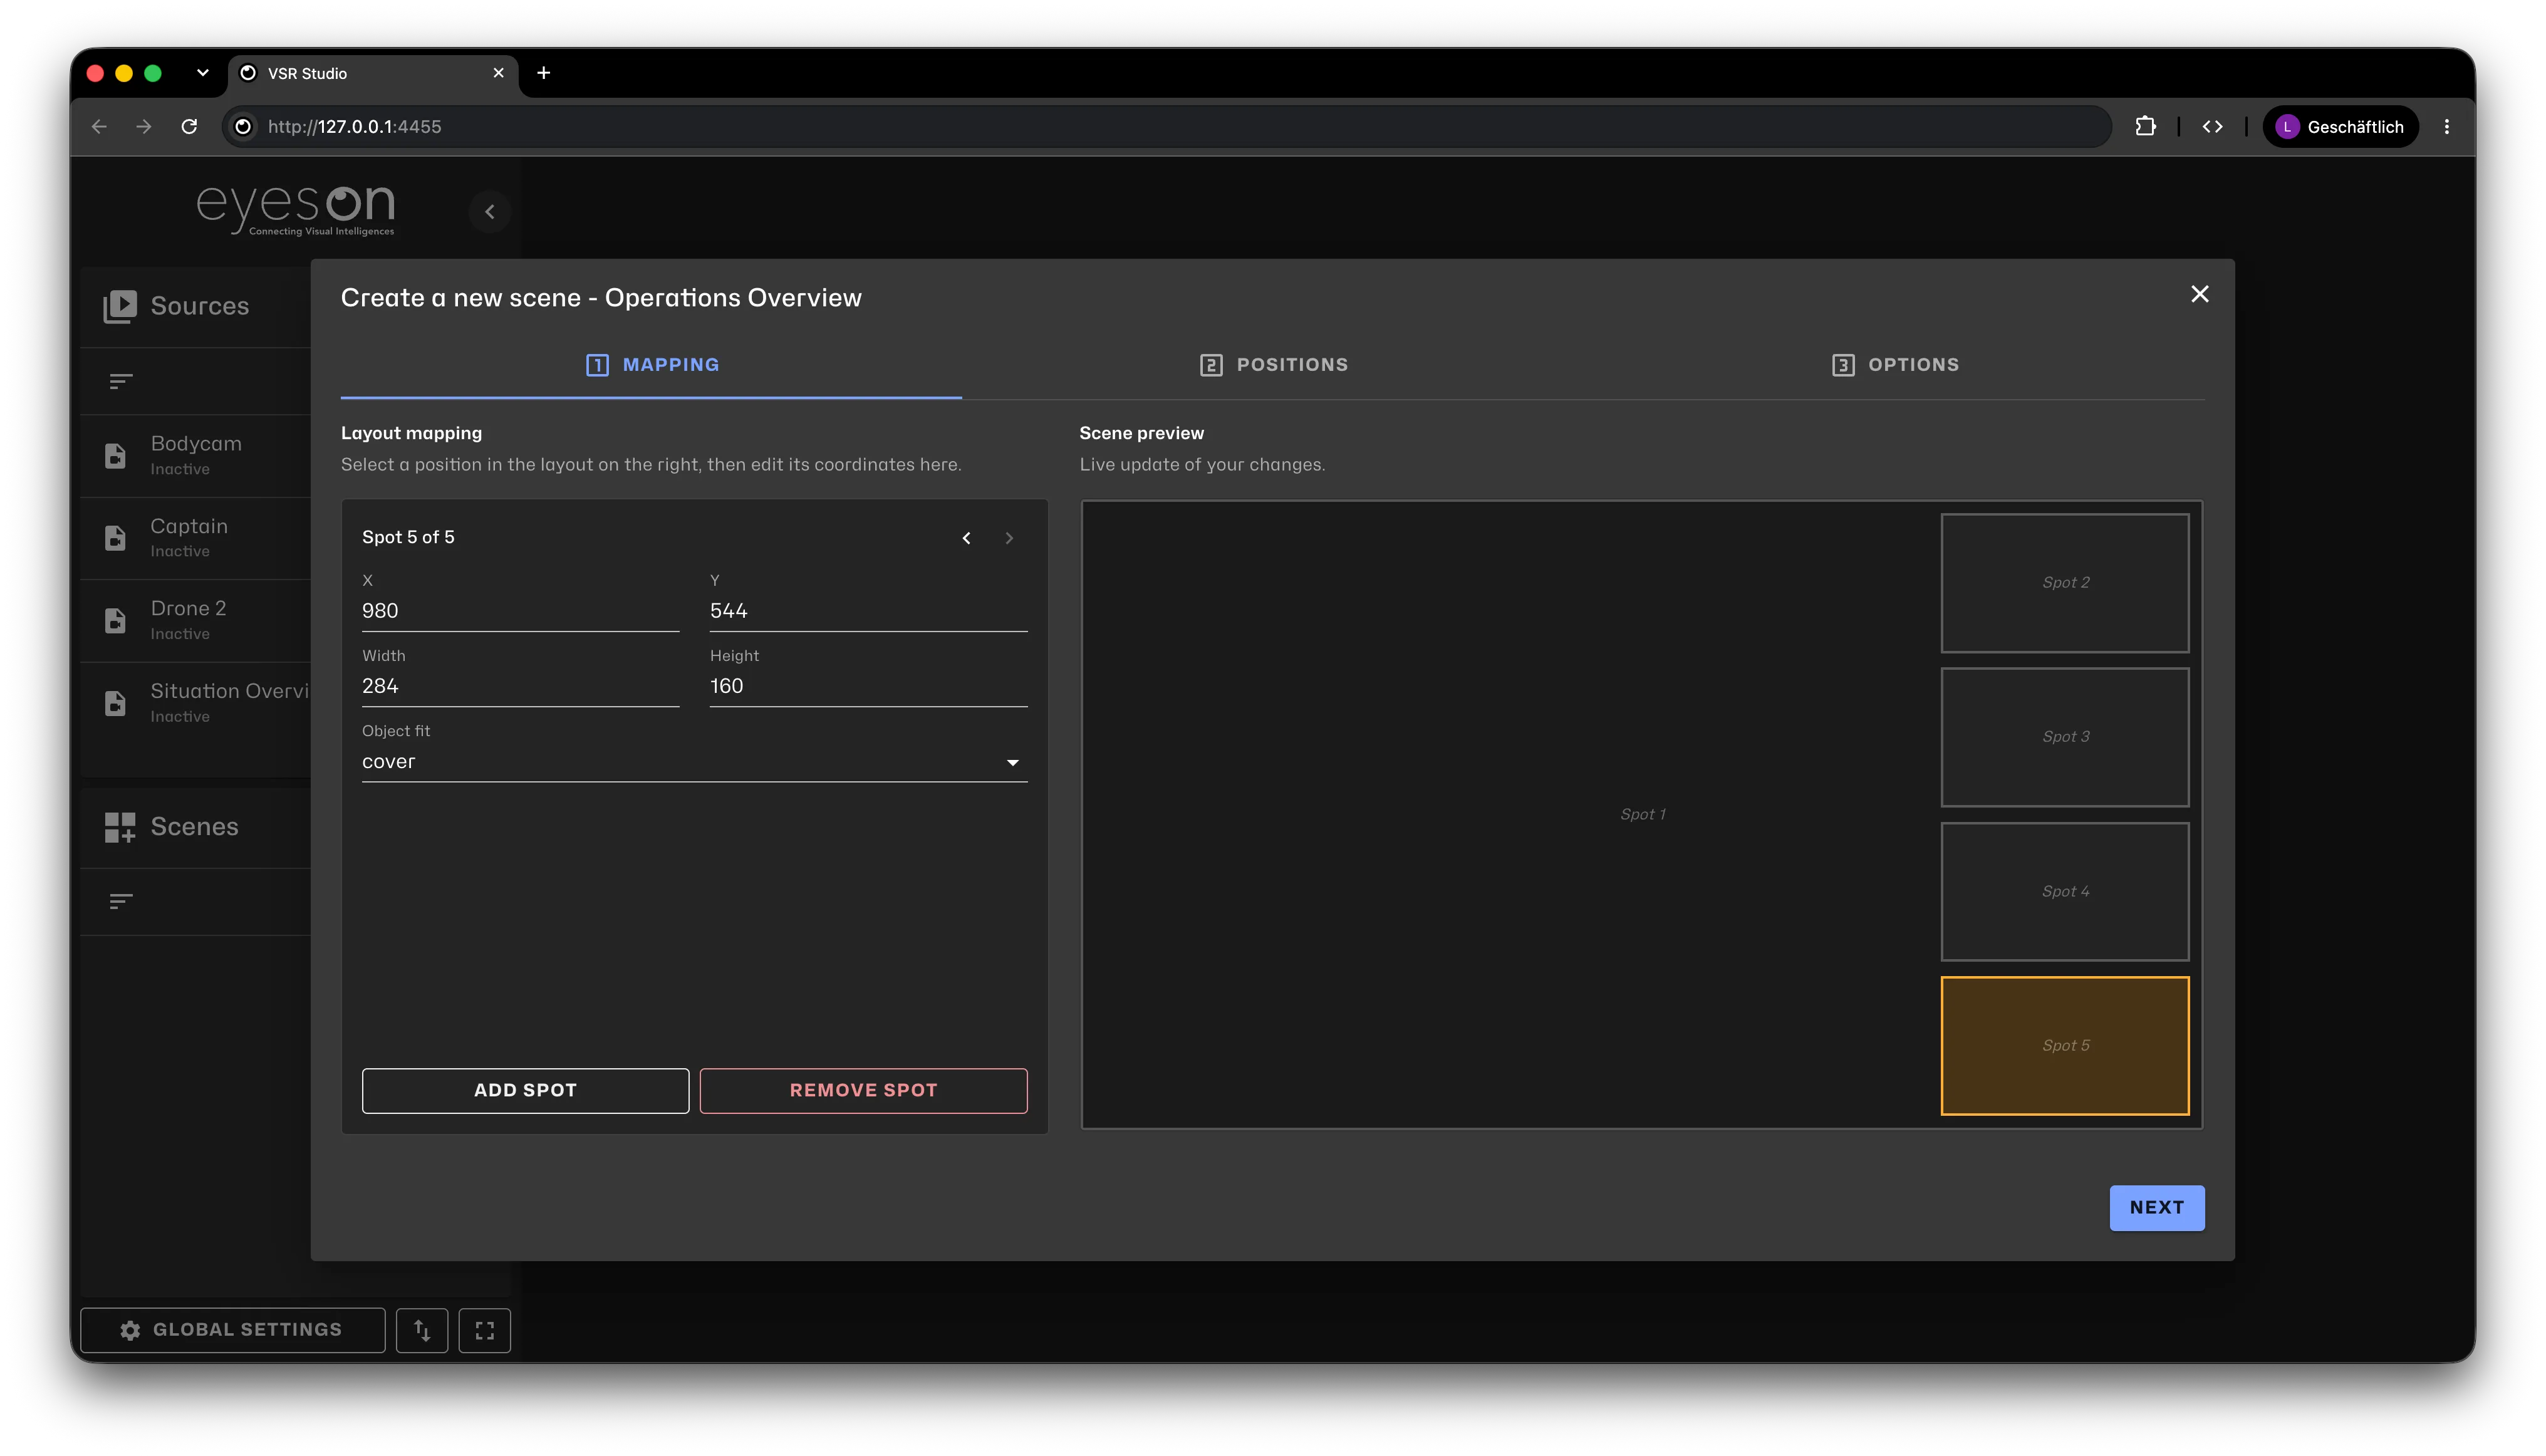
- Add the five positions below in this exact order.
Enter Width and Height before X and Y. Otherwise, the current spot size may exceed the scene boundaries and prevent coordinate input.
| Position | X | Y | Width | Height | Object Fit |
|---|---|---|---|---|---|
| 1 | 0 | 0 | 1280 | 720 | Cover |
| 2 | 980 | 16 | 284 | 160 | Cover |
| 3 | 980 | 192 | 284 | 160 | Cover |
| 4 | 980 | 368 | 284 | 160 | Cover |
| 5 | 980 | 544 | 284 | 160 | Cover |
Positions 2–5 overlap Position 1 intentionally. They do not overlap one another, and every spot remains inside the 1280 × 720 canvas.
Step 4: Assign the sources
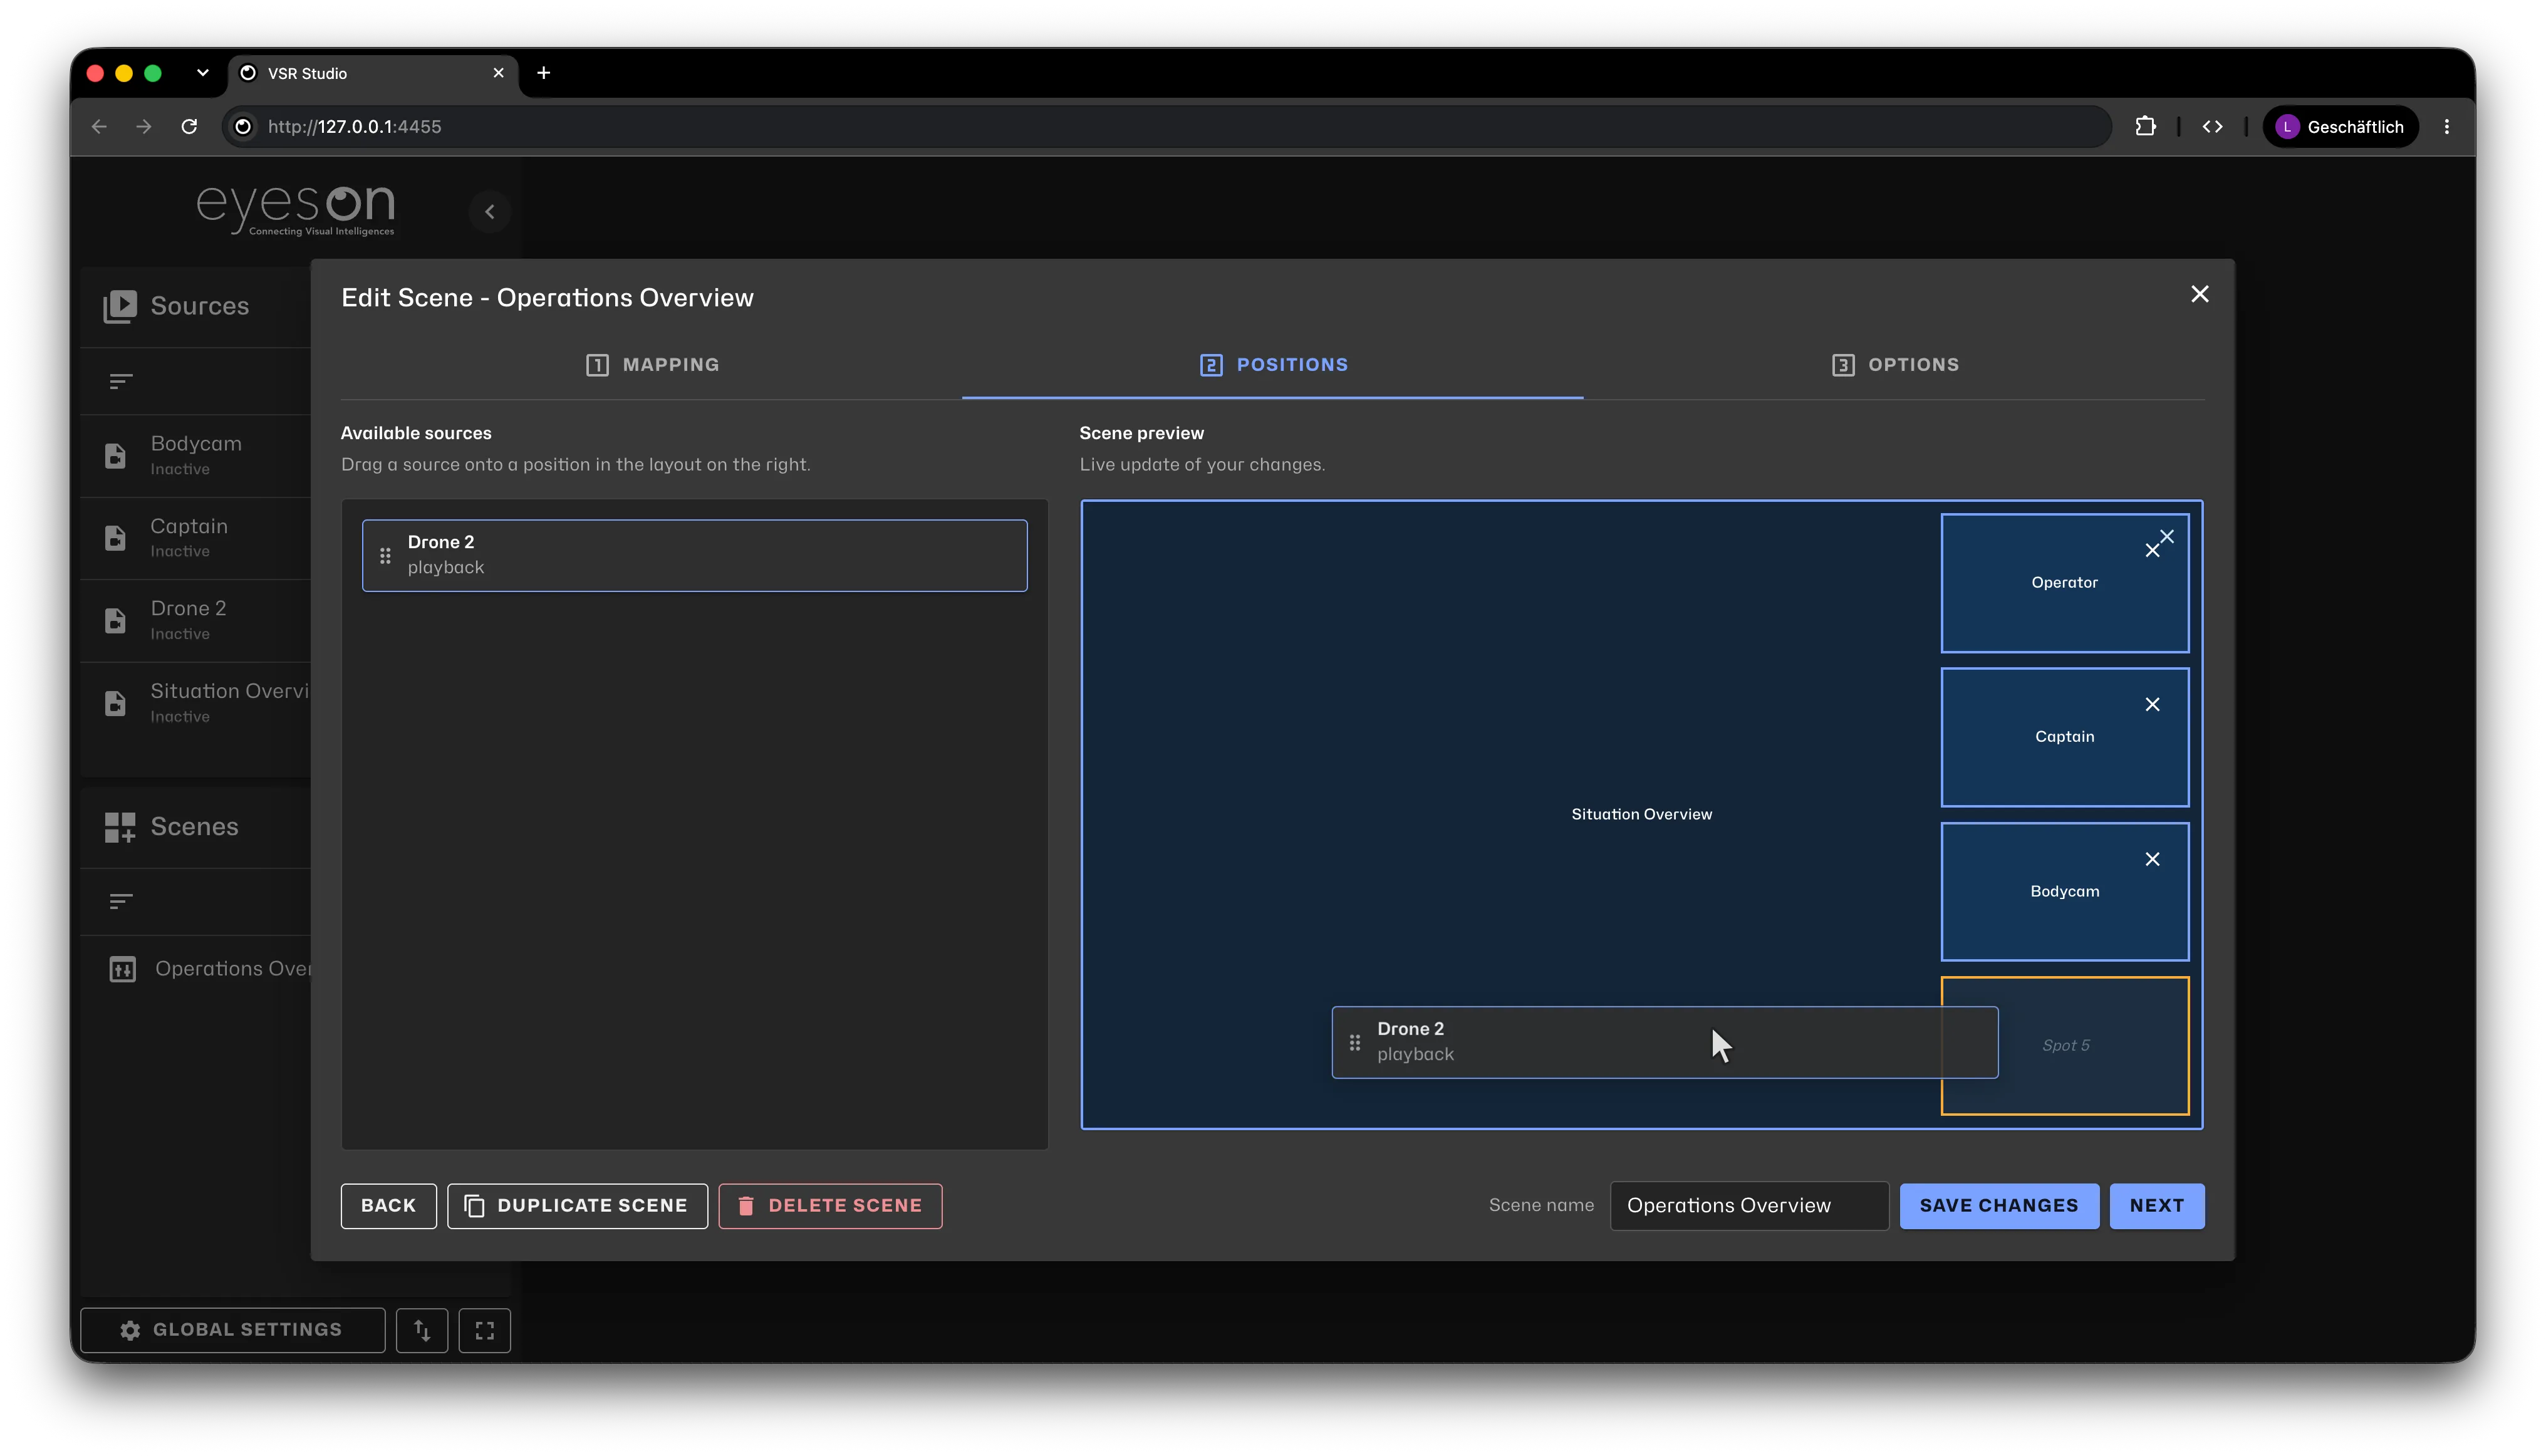
On Positions, assign:
- Position 1 → Situation Overview
- Position 2 → Operator — You
- Position 3 → Captain
- Position 4 → Bodycam
- Position 5 → Drone 2
The VSR host is the participant created when you start the room - do not create a source for this position. Confirm that Position 1 is the full-width background view and that Positions 2–5 form a vertical column on the right.
Step 5: Add the overlay
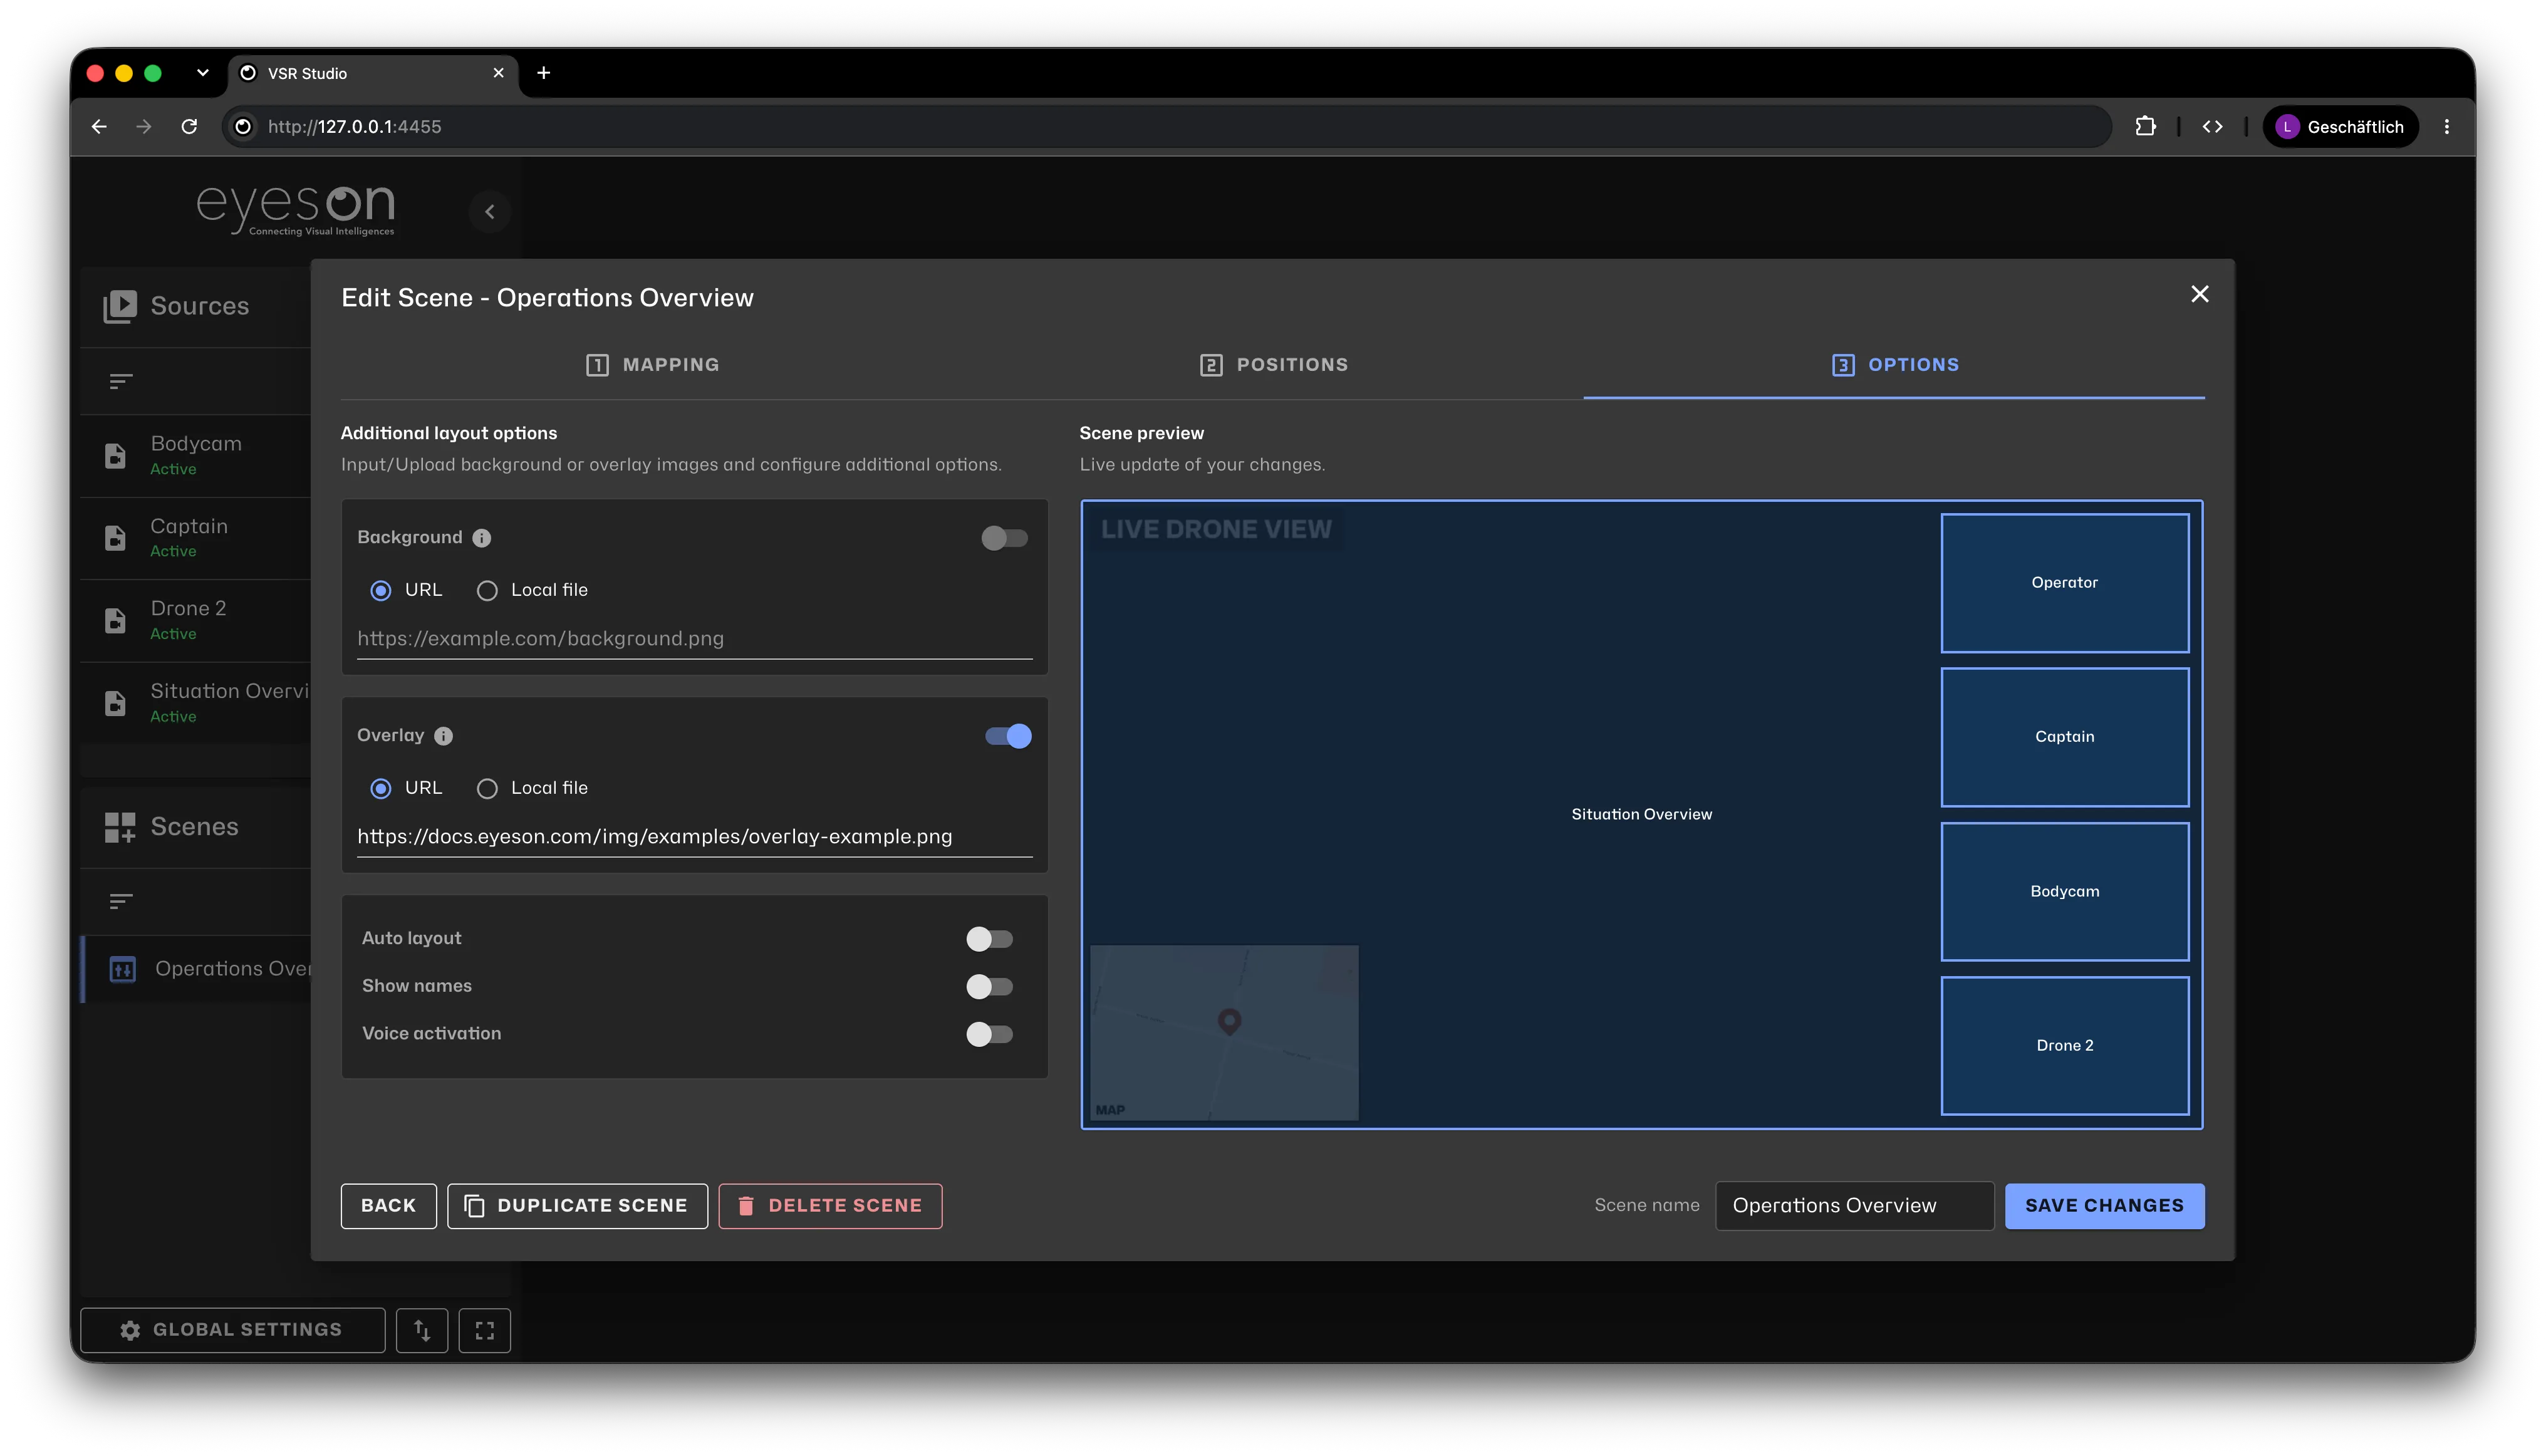
The overlay adds the LIVE DRONE VIEW title at the top-left and a map at the bottom-left without covering the video between them.
-
Open Options.
-
Enable the Overlay with the toggle on the right side.
-
Add an Overlay using this URL:
https://docs.eyeson.com/img/examples/overlay-example.png -
Confirm that the title and map appear over the preview while the rest of the image remains transparent.
Step 6: Finish and run the scene
- Leave Background empty and keep the overlay from Step 5.
- Enable Show participant names so the overlay spots are identifiable.
- Disable Voice Activation to preserve the assignments.
- Select Create Scene.
- Click Start Session and wait until the room is ready.
- Allow camera access and enable the camera.
- Activate sources.
- Wait until all four playbacks show a healthy status.
- Select scene.
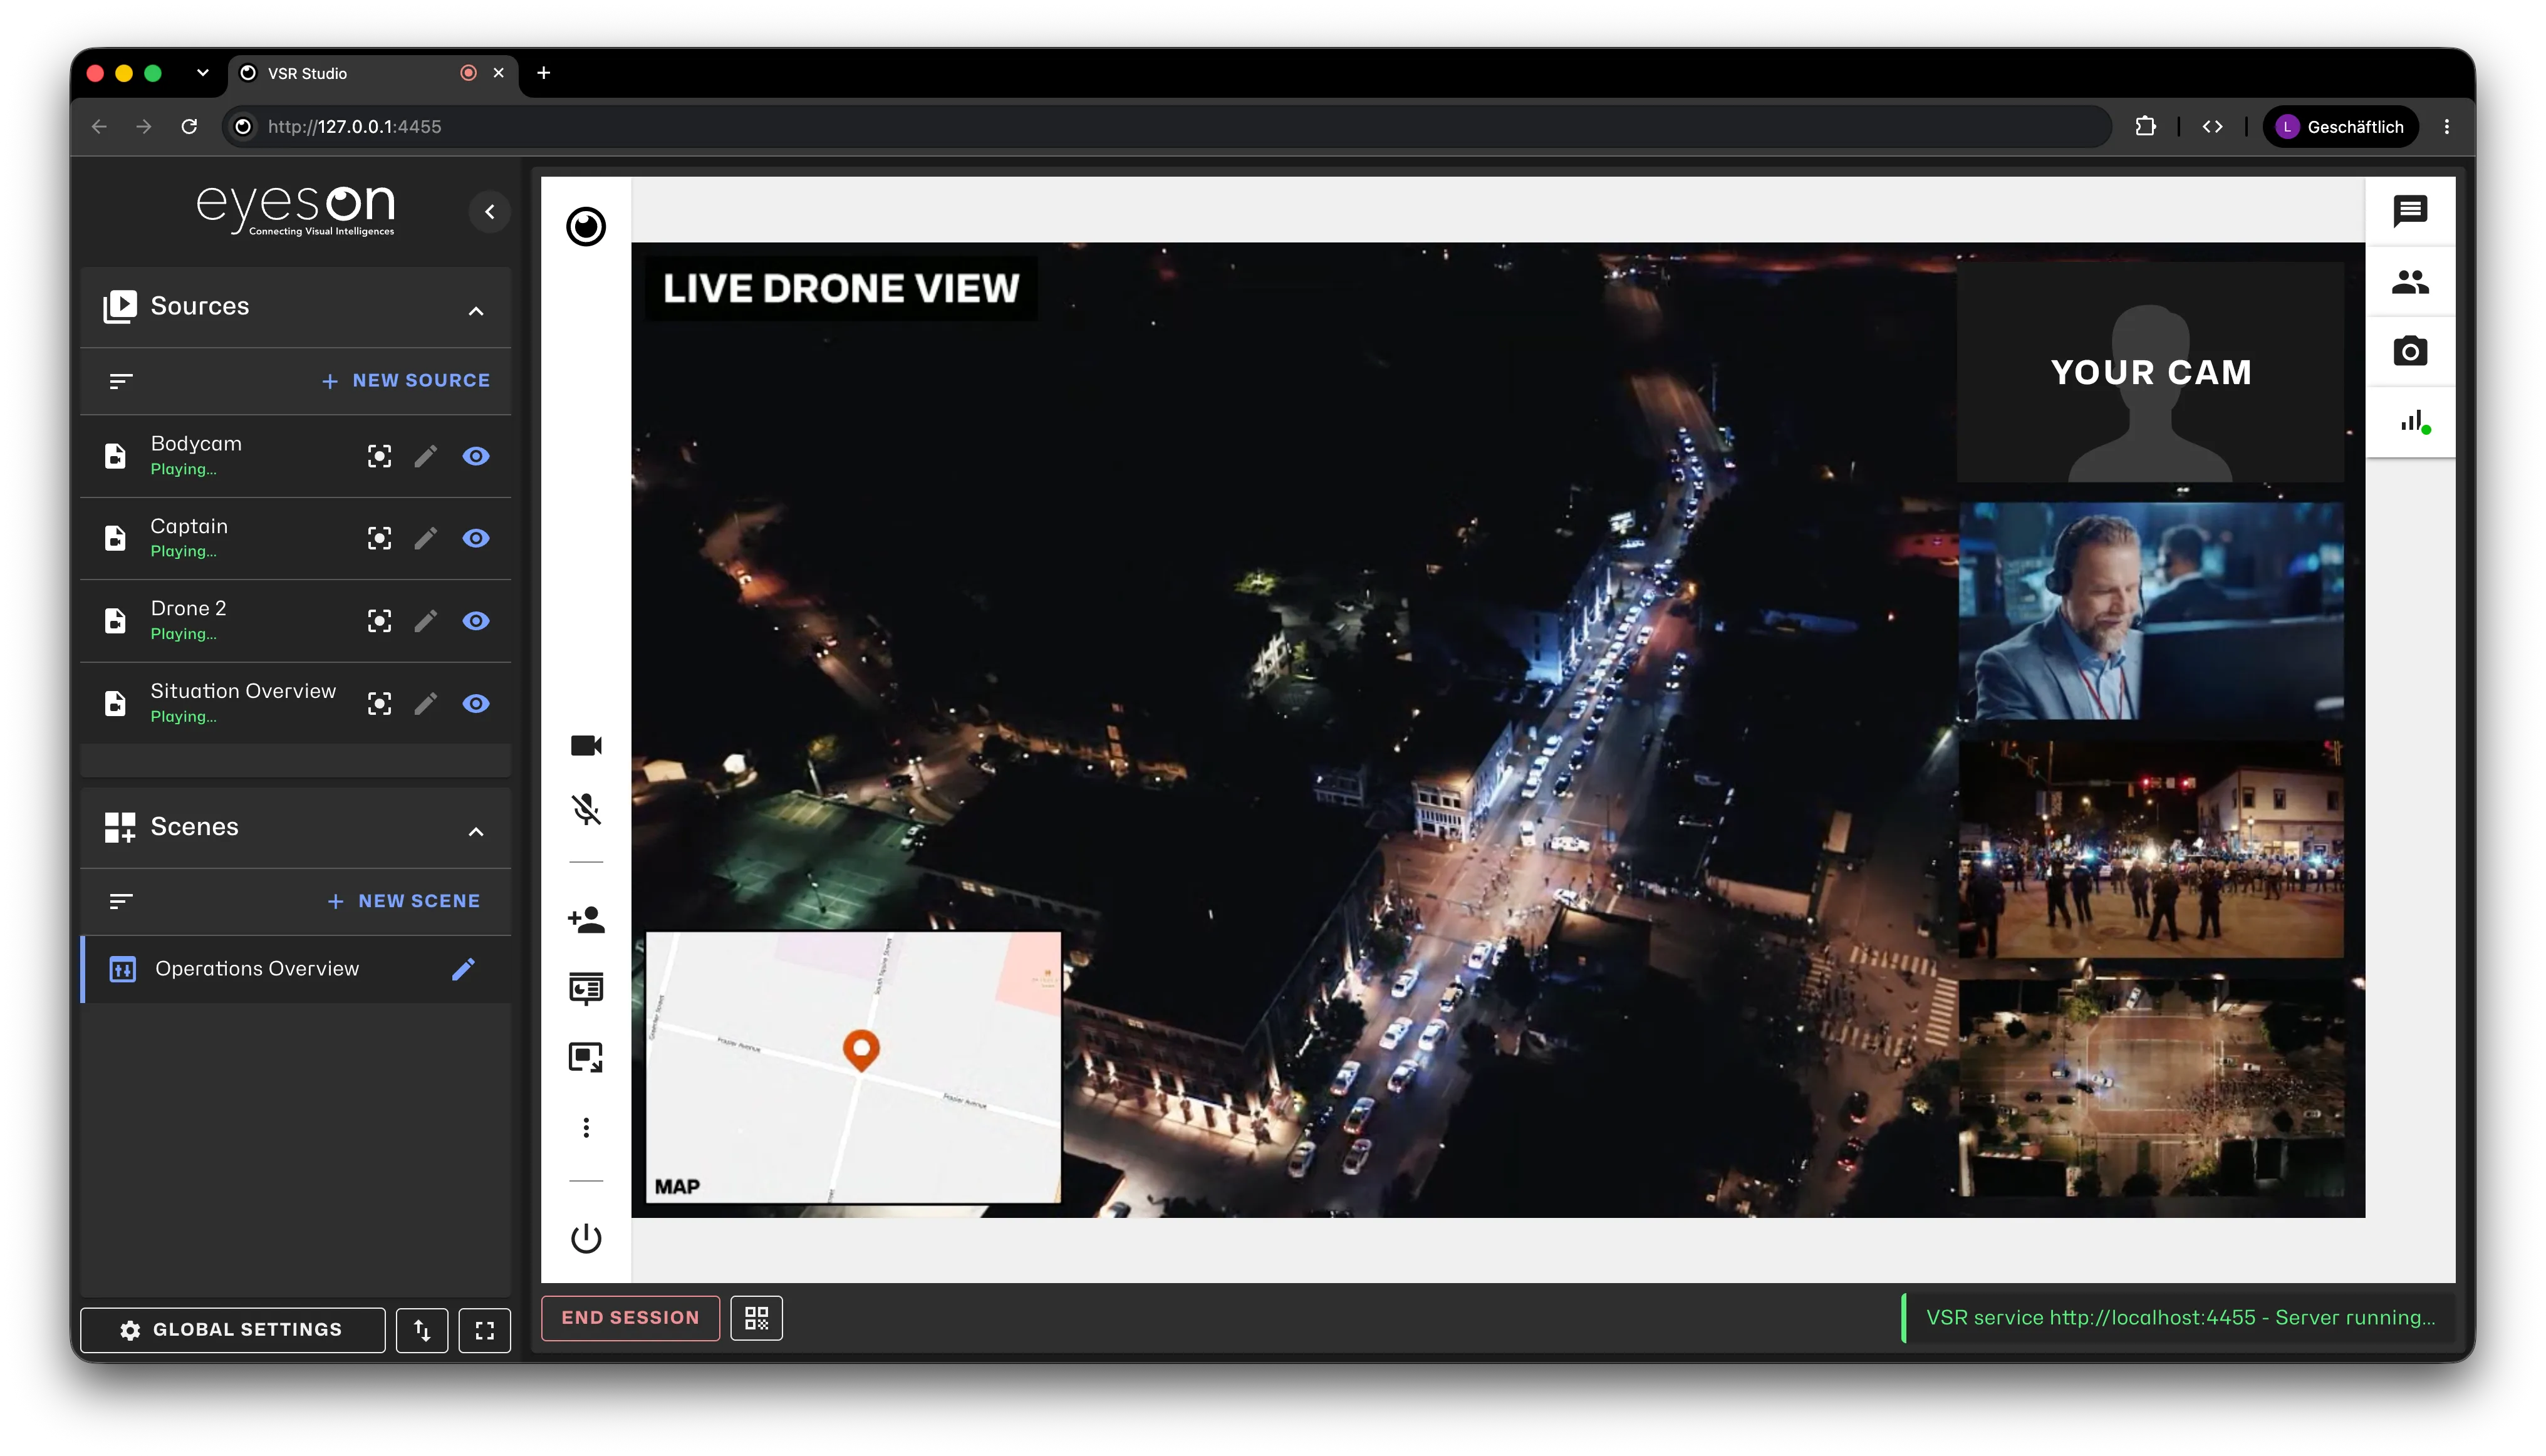
- Confirm that the overview fills the canvas and that the host, operator, bodycam, and IP camera appear in evenly spaced spots on the right.
- Let the scene run long enough to confirm that every playback loops.
- Select End Session when the test is complete.
Temporarily focus a source
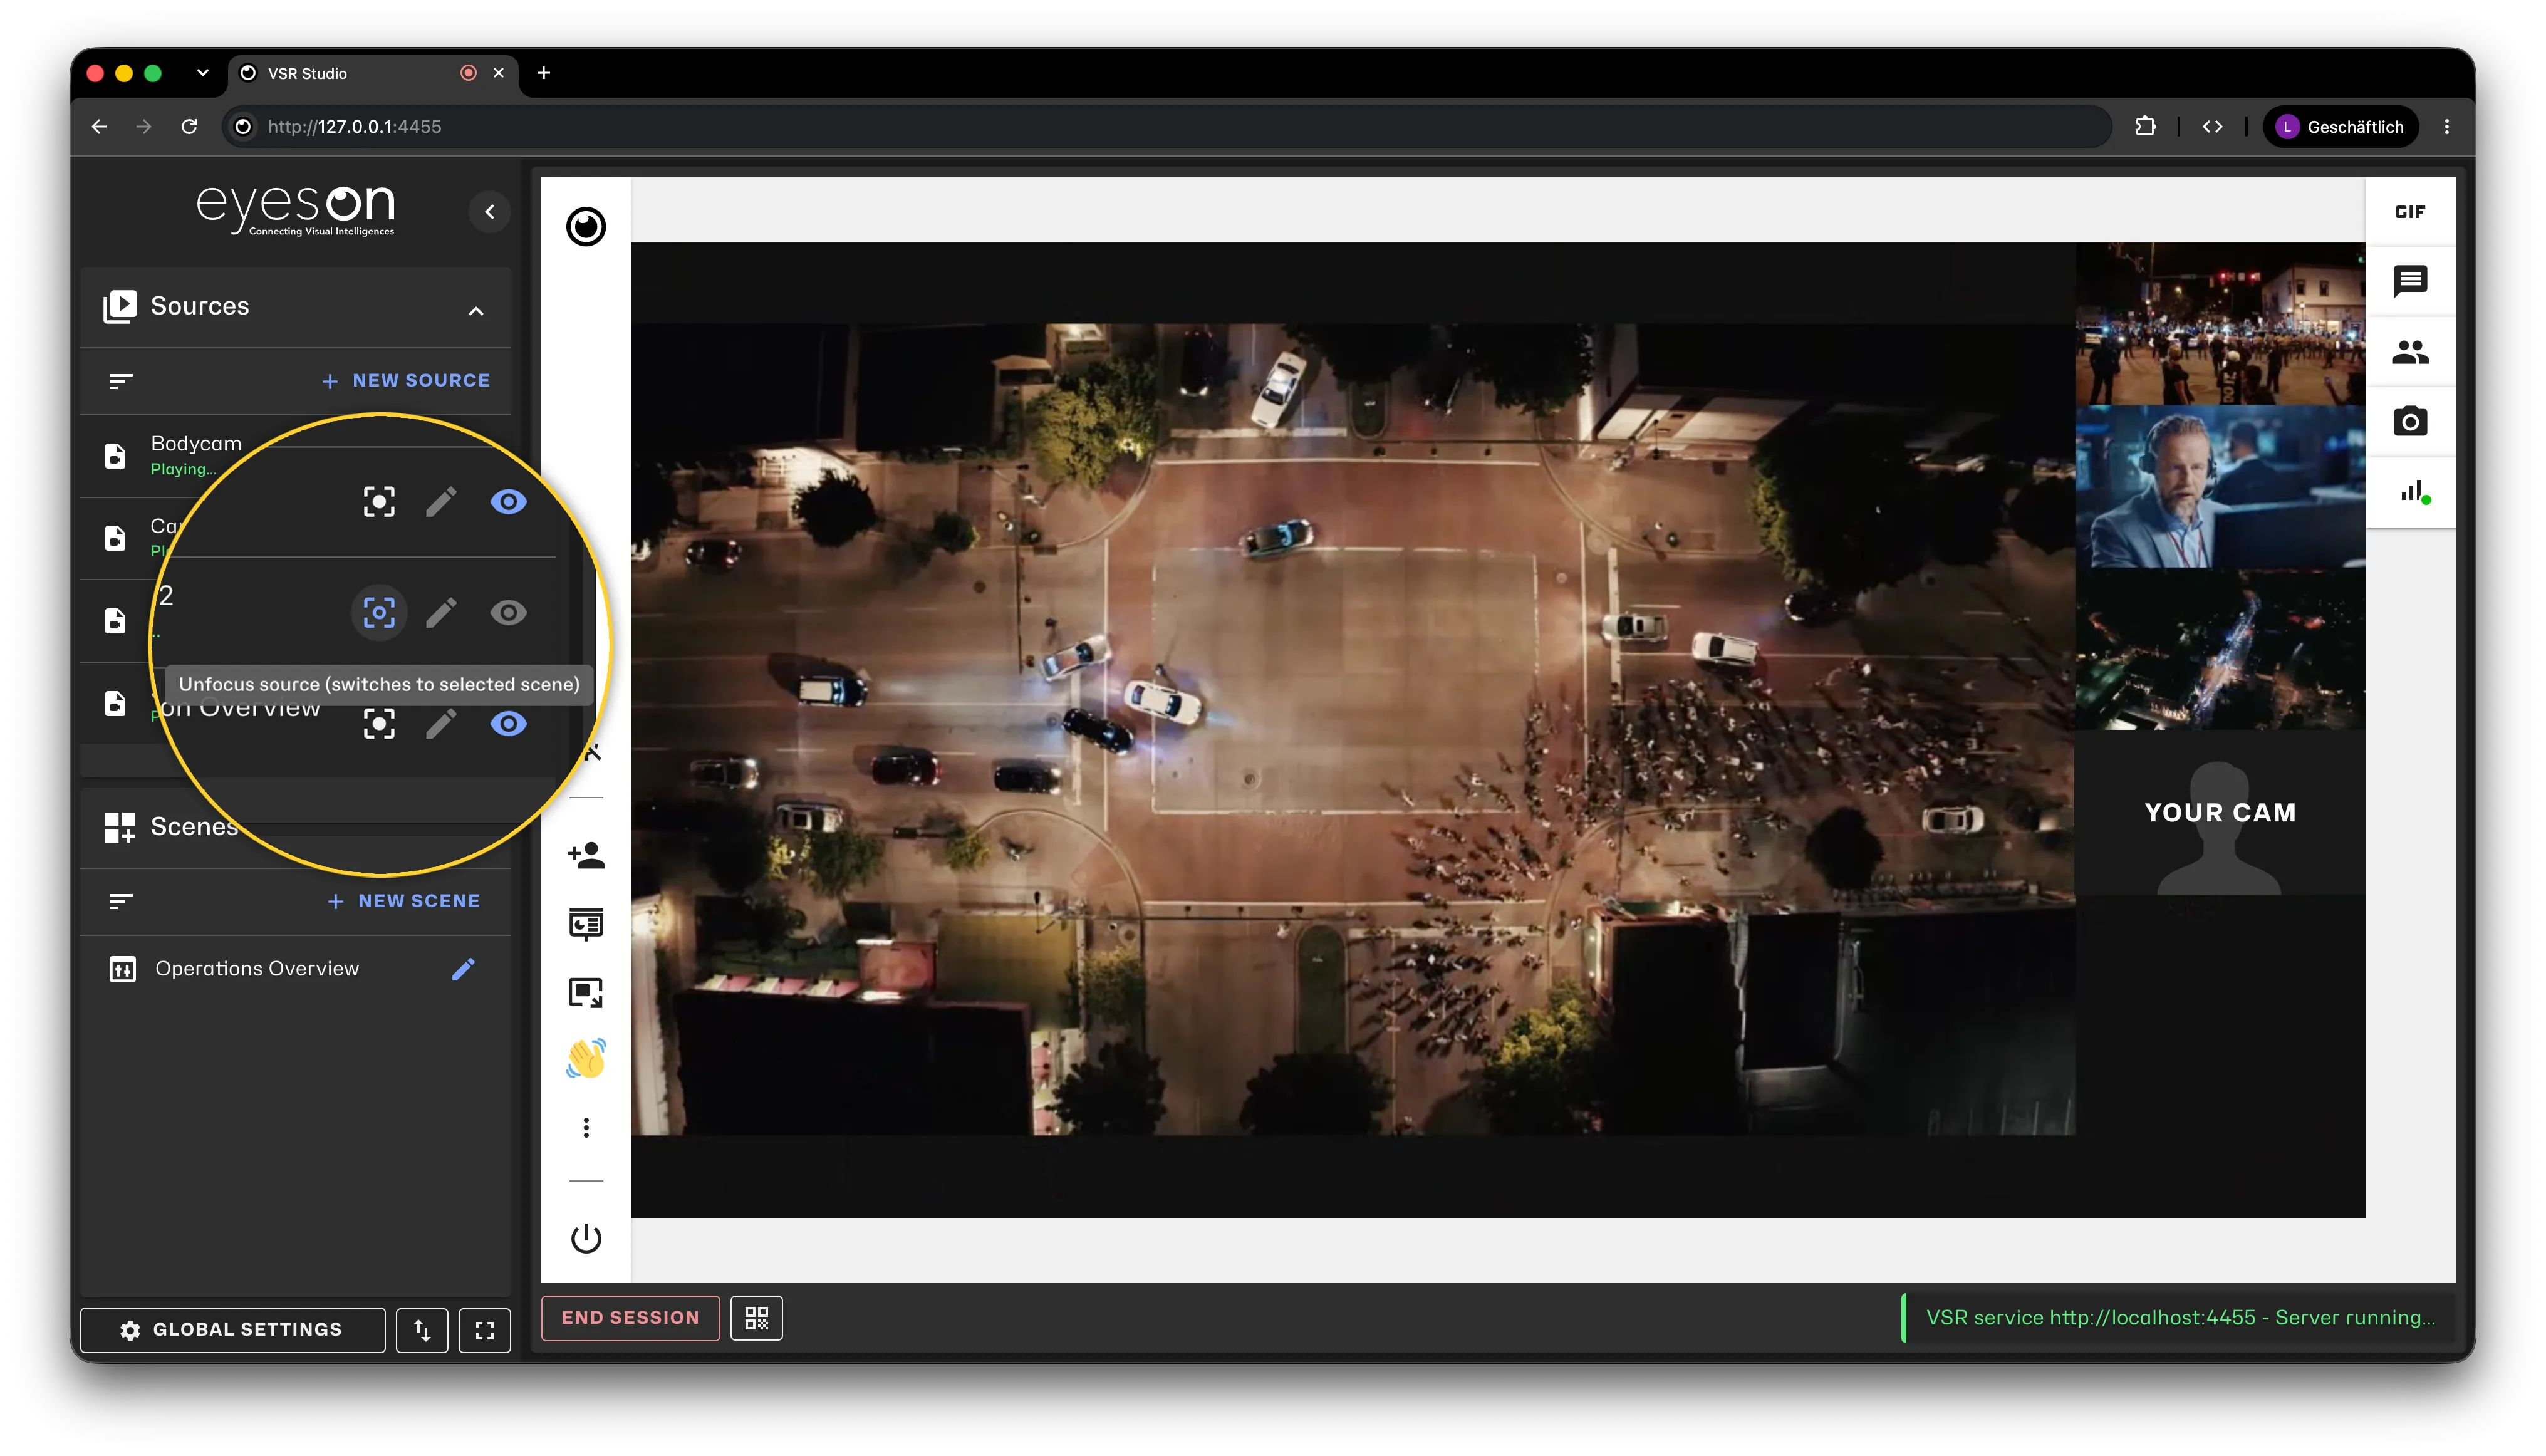
During the session, you can focus any source to show it prominently. Select the focus button next to the source, then select it again to return to Operations Overview. The scene and its position assignments remain unchanged.
A focused source cannot be deactivated. Remove the focus first if you need to deactivate it.
Use real camera streams
The playback sources can be replaced with real streams from drones, IP cameras, bodycams, and other devices. Follow Create and check sources in the VSR Studio Manual, then select rtsp or rtmp as the protocol. Configure and test the new source, then edit the scene and assign it to the required position. The layout coordinates do not need to change.
Cover fills a spot but may crop the source edges. Use Contain when the complete image must remain visible.
Finally, use Import / Export to save the working sources and scene as a JSON backup.
For more information about position coordinates and object fitting, see the Room Layout reference.